Plan a luxury bathroom renovation in this order: brief and budget, survey, design, full-size selection, quantities, ordering, the trades, then snagging. Each step fixes something the next one depends on. Skip the survey or the quantities and the usual result is a product bought twice, or a valve set for a wall that later changed.
In this guide 13 sections
- The eight steps on one page
- Brief and budget: what the room must do, and what it may cost
- Survey before anyone draws
- Design: one room, drawn before anything is bought
- Inside the Aldenham en-suite plan
- Choose at full size, in real light
- Who works out the quantities?
- Order in the sequence the room is built
- How the trades build the room up
- Snagging before the final payment
- How long does a bathroom renovation take?
- Regrets that come from the wrong order
- Starting this autumn
The expensive mistakes in a bathroom renovation are rarely about taste. They are sound decisions taken in the wrong order: a tile chosen before anyone knew where the soil stack runs, a vanity ordered before the wall was measured, a glass screen made to a drawing rather than to the tiled opening.
Perhaps it is the family bathroom you have been putting off for three years, or an en-suite that has to be finished before the rest of an extension can be signed off. The sequence is the same either way, and it is the one any good installer will recognise.
The eight steps on one page
Each row depends on the one above it. The timings are relative, because the real calendar belongs to your room, your products and your installer's diary.
| Step | Who leads | What it settles |
|---|---|---|
| 1. Brief and budget | You, with your designer | What the room must do, and the spending band |
| 2. Survey | Your installer or builder | What the building allows: soil stack, joists, floor levels |
| 3. Design | Your bathroom designer | Layout, lighting and the position of every product |
| 4. Full-size selection | You, in the showroom | The lead tile, then everything that sits against it |
| 5. Quantities and setting-out | Designer or tile specialist | How much to order, and where every cut falls |
| 6. Ordering | You or your installer | Everything on site before the strip-out |
| 7. The trades | Your installer | The room, built up layer by layer |
| 8. Snagging | You, with your installer | Defects found before the final payment |
Brief and budget: what the room must do, and what it may cost
A useful brief fits on one page. Who uses the room, and when? A long bath every evening, or five minutes under the shower before the school run? Is there a parent who visits and finds the step into the bath harder every year?
Then set the budget, because it decides which products are worth looking at. Our luxury bathroom cost guide puts the figure plainly: a luxury bathroom in the UK typically costs between £25,000 and £60,000 in 2026, with high-end and ultra-luxury projects reaching £80,000 to £150,000 and beyond.
Within those totals, the guide shows where the money tends to go:
| Item | Typical figure (DDL cost guide) |
|---|---|
| Branded sanitaryware: freestanding bath, wall-hung WC with concealed frame, basins | £4,000 to £15,000+ |
| Designer brassware, a full set including a thermostatic shower system | £1,500 to £6,000+ |
| Bespoke joinery | Typically adds £2,500 to £8,000+ |
| A considered lighting scheme with the electrical work | Typically adds £1,000 to £4,000+ |
| Waterproofing and tanking | Typically adds £600 to £2,500+ |
| Underfloor heating | Typically adds £800 to £2,500 |
| Premium porcelain, marble-effect and stone-effect ranges | Typically £60 to £200+ per m² supply-only |
Hold back a contingency as well. An old bathroom can hide a soft joist or pipework nobody has looked at in decades, and the time to find that money is before the walls are open, not after.
Survey before anyone draws
Before any design work, find out what the room will let you do. Measure it properly: ceiling heights, the window reveal, the swing of the door. Then find the fixed points, which are the soil stack, the waste route, the direction of the joists, the cylinder or boiler and any wall that carries load.
The soil stack decides more layouts than any designer does. A WC can only travel so far from it before the pipework becomes a problem, and moving it is where a comfortable budget quietly becomes a stretched one. If you want a level-access shower, ask now whether the floor can be dropped between the joists or has to be built up around the tray.
Some of the work may also fall under the Building Regulations: new electrical work can be notifiable under Part P, new extraction falls under Part F and new drainage under Part H. Confirm what applies with your installer or building control before the design is fixed.
Design: one room, drawn before anything is bought
Design turns the brief and the survey into a drawn, specified room, and on a single bathroom it is the step people are most tempted to skip. What our design pack contains is set out on the bathroom design service page; for a renovation, what matters is everything it fixes before the trades arrive, and one real plan shows that better than a description.
Inside the Aldenham en-suite plan
On the master en-suite for our Aldenham project, one of five bathrooms we designed for the same house, everything that would disappear into a wall or a floor was positioned on paper first.
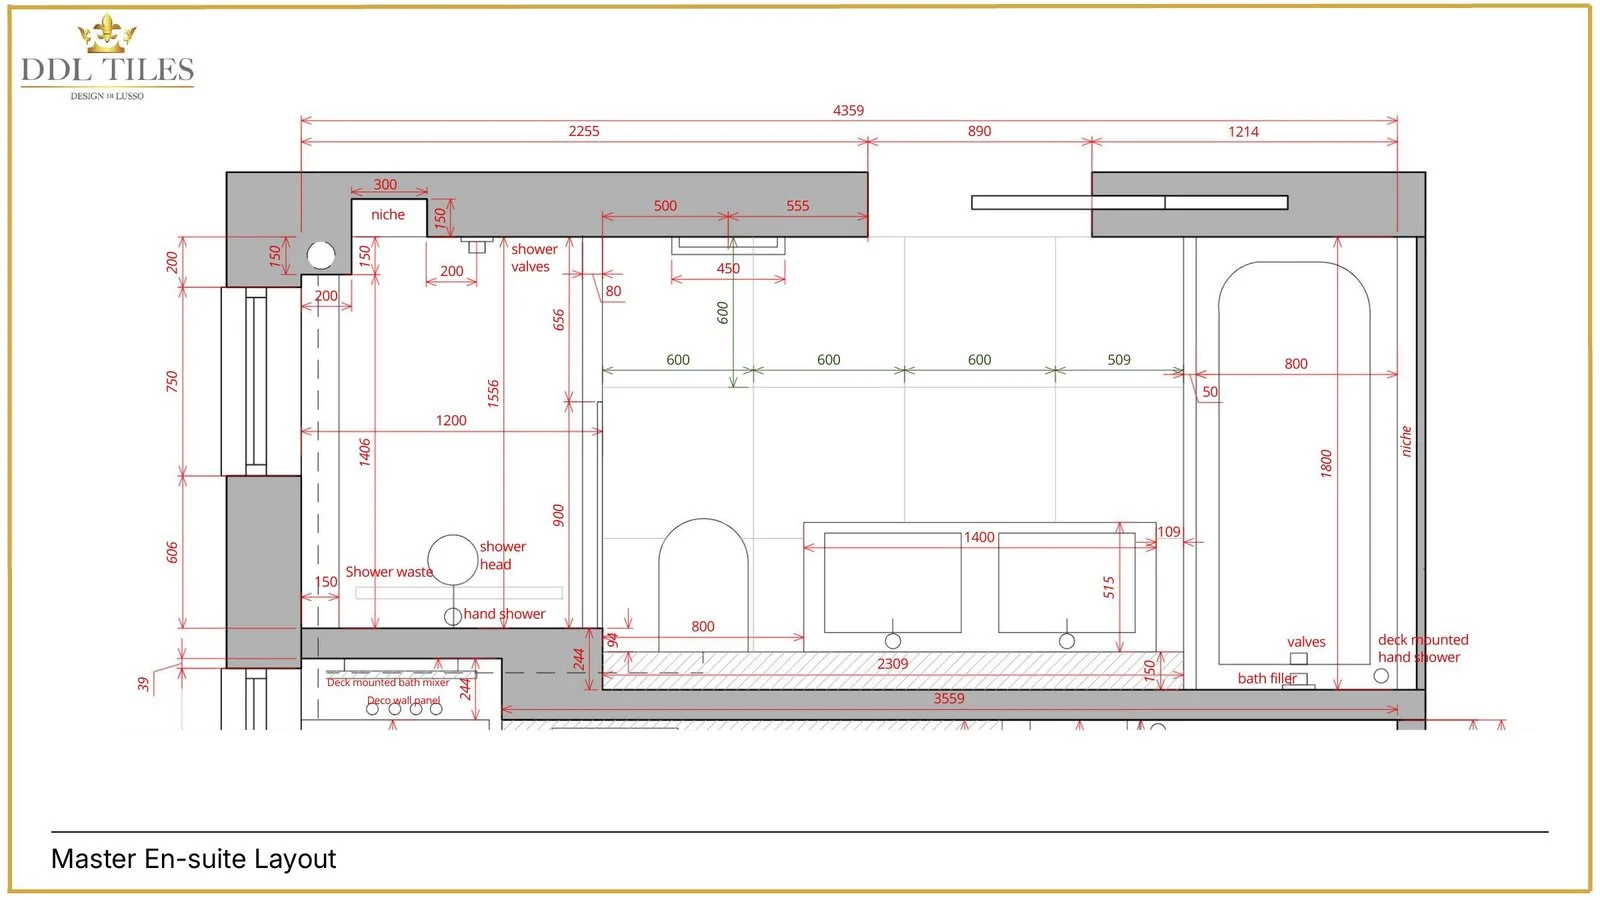
Read the drawing as a plumber's first-fix list. The shower valves, shower head, linear shower waste, bath filler and bath valves all have a dimensioned position. Both niches are sized, so the stud wall is framed around them instead of being cut into later.
The 600mm tile grid is drawn across the floor as well. Before a single box is opened, the tiler knows where the first full tile sits and which wall takes the narrow piece.
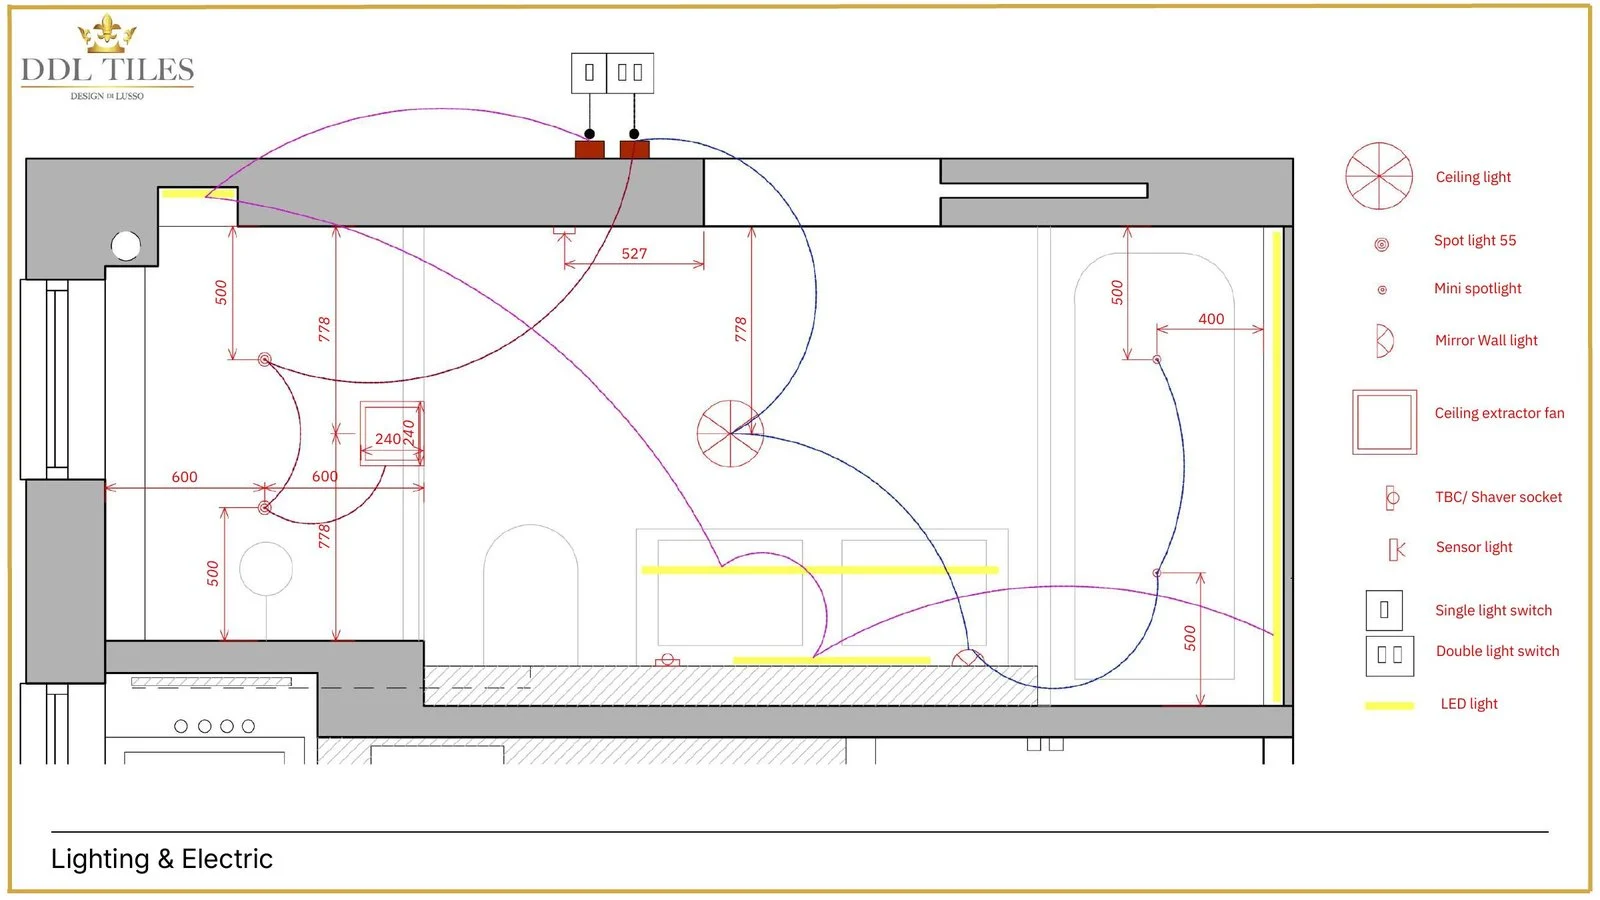
The second sheet does the same job for the electrician: ceiling light, spotlights, LED strips, mirror light, extractor, sensor light and every switch. Cables go in once. Nobody stands in a half-boarded room deciding where the mirror light should go. All five rooms are on the Aldenham Home project page.
To see the materials behind a plan like this, book a complimentary showroom appointment and we will set the lead tile beside vanity finishes and brassware at full size. Bring photos of the room, any drawings you have and the square metres of each wall and floor, so we can quote.
Choose at full size, in real light
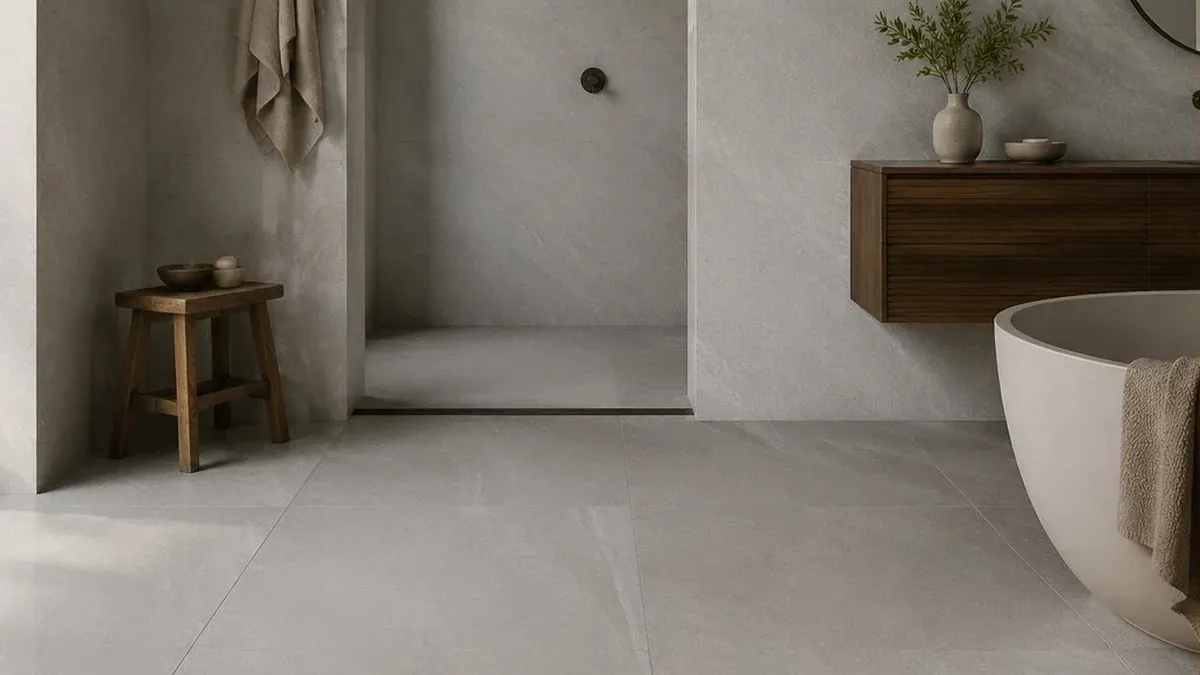
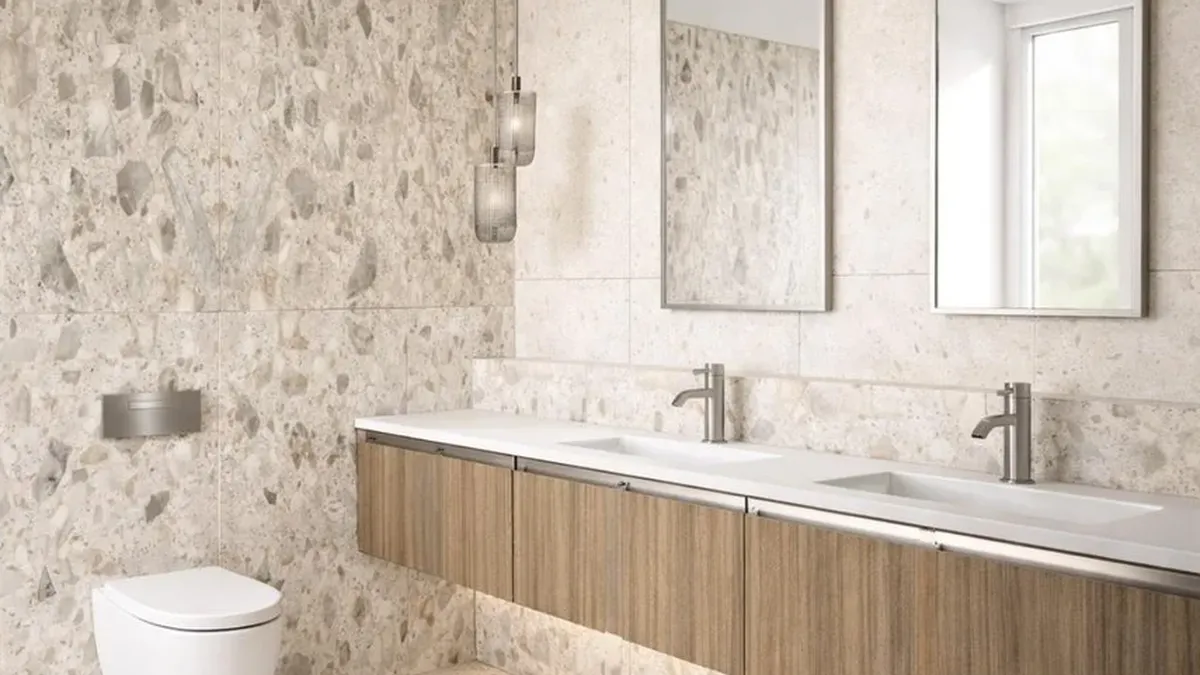
A sample the size of your hand cannot show what a whole wall will do. Veining that looks gentle on an offcut can run across a 1200x1200mm tile in one bold sweep, and a grout colour that seemed neutral on a sample board can outline every tile once there are hundreds of them on the wall.
Choose the lead tile first, then everything that sits against it: the vanity, the brassware finish, the glass and the lighting. Bring the paint swatch, the timber sample or the door handle the bathroom has to live beside. Ask to see shower floor tiles wet, too.
Dinesh Mathur founded DDL in 2011 as a tile sourcing service for architects and interior designers, and we still source from selected Spanish and Italian factories rather than designing around whatever is in stock. The Watford showroom is appointment-only, so a specialist has the time set aside for your project, and large formats up to 1200x1200mm are shown at full size.
Bespoke Italian vanity units, which we have offered since 2024, belong at this step too. A vanity made to fit its wall exactly has to be specified before that wall is tiled.
Who works out the quantities?
Someone has to, in writing, before anything is ordered. Quantities decide whether you order once or twice. Setting-out decides where every cut falls: at the door, round the niche, along the bath and at the edge of the shower.
On a bathroom we design, the layout and the specification come with the design pack. If you are choosing tiles only, a showroom appointment quotes from the square metres you give us, and we do not calculate quantities from plans at that appointment.
For several bathrooms, or a bathroom inside a ground-floor renovation, our project consultation service reviews your drawings, estimates the quantities, sets the tile grid over the plan and produces a written specification your installer can work from.
Order in the sequence the room is built
Ask for the lead time of every item when it is specified, and confirm availability before the room is stripped. Stock products can arrive quickly. Bespoke vanities, cut-to-size pieces and made-to-order items are produced for your project, so the slowest of them sets the earliest sensible strip-out date.
Ordering in waves is normal. Concealed valves, WC frames and drains go into the walls and floor at first fix, so they are needed first; tiles follow, then sanitaryware, brassware trims, mirrors and lighting. The most expensive week in any renovation is the one where a stripped room waits for a single missing part.
Order every tile of each design at once, with an allowance for cuts agreed with your installer, so it all comes from one production batch. Batches can differ slightly in shade, and the difference shows when two sit side by side on one wall.
Keep the spare boxes from that batch in the loft. With them, a cracked tile in five years' time is a small repair; without them, it can mean retiling the whole wall.
How the trades build the room up
The trades follow the order the room is built in, and each stage hides the one before it. A typical sequence runs like this:
- Strip-out, plus any structural or floor work the survey found.
- First fix: pipework, wastes, concealed valves and cistern frames, cabling, extraction and any underfloor heating.
- Walls and floors prepared: boarding, plastering where needed, and levelling.
- Waterproofing the shower and any other wet area.
- Tiling.
- Second fix: sanitaryware, brassware, vanity, lighting and accessories.
- Glass screens, measured once the tiles are on.
- Silicone, decoration and a final clean.
A concealed valve has to be set for the finished wall, tile and adhesive included. That is why the tile is chosen before first fix rather than during it, and why the glass is measured from the tiled opening, never from the drawing.
Briefing your installer
DDL designs and specifies; your installer works from the written specification. Hand over the drawings and that specification, never a verbal description, and agree in writing who orders what.
Ask for a quote that lists what is and is not included, especially waterproofing, levelling, electrics and making good. Electrical work in a bathroom must meet BS 7671, the wiring regulations, so ask how it will be tested and certified.
Snagging before the final payment
Walk the room in daylight, then again with the lights on, before the trades leave and before the last invoice is paid.
- Hold a torch low along the walls and floor; large tiles should sit flush, with no edge standing proud of its neighbour.
- Grout even in colour and fully filled, silicone neat.
- Run the shower for a few minutes. Water should head straight for the drain, with none sitting in corners or creeping onto the bathroom floor.
- Niches, mirrors, lights and brassware where the drawings put them, level and lined up with the tile joints.
- Every tap, flush, light, extractor and the underfloor heating tested.
- Guarantees, care instructions, certificates for any notifiable work and your spare tiles in your hands.
How long does a bathroom renovation take?
Longer than the weeks the trades spend in the house, because three clocks run at once. The first is design and decisions: our bathroom design stage usually takes around 2-4 weeks, depending on how complex the room is and how quickly decisions come back, so a scheme started now can be drawn up before Christmas.
The second clock is the lead time of the slowest product. The third is time on site, which your installer should set out in a written programme once the specification is fixed, because it depends on the layout changes, the waterproofing and the drying times their method needs.
You control the first two. Finish steps one to six before a strip-out date is agreed, and the third clock runs without pauses.
Regrets that come from the wrong order
Most renovation regrets are not about style. They are small sequencing failures that only show once the room is finished:
- A second tile order. It arrives from a different batch, and the shade change sits in the middle of a wall.
- No spares kept back, so a cracked tile years later cannot be matched.
- Glass ordered from the drawing. Tile and adhesive add thickness, and the screen arrives a few millimetres out.
- A valve set before the tile was chosen. A thicker tile than expected leaves the trim sitting too deep or too proud.
- A niche cut in after boarding, landing on a stud or finishing on a sliver of tile.
- A strip-out booked before the vanity was confirmed, leaving the household without a basin for longer than anyone planned.
Design regrets, such as too many competing materials or a single ceiling light, are a different list, and our luxury bathroom design guide covers them.
Starting this autumn
If you want builders in early in the new year, the work that protects the budget happens now, on paper. Book a complimentary showroom appointment to choose the lead materials at full size, and bring the room's measurements, photos and any drawings you have. If you would like the whole room designed, the next step is our bathroom design service at £400 + VAT per bathroom, deducted from your subsequent order when that order exceeds £5,000 + VAT.
Sources
- Approved Document P: electrical safety in dwellings.
- Approved Document F: ventilation.
- Approved Document H: drainage and waste disposal.
- BS 7671: Requirements for Electrical Installations, the IET wiring regulations.
- DDL Tiles, How much does a luxury bathroom cost in the UK? (2026 guide), for all cost figures.