The best kitchen splashback is the one with the fewest joints behind the hob. A single porcelain slab or a full-height large-format panel leaves no grout for grease to settle in, and a marble, stone or onyx look gives it character. Keep pattern for the quieter parts of the wall.
In this guide 12 sections
- Kitchen splashback ideas at a glance
- Full-height slab or tile: which suits your kitchen?
- What does a porcelain slab splashback involve?
- Marble, stone and onyx looks behind the cooker
- Where does pattern belong in a splashback?
- What should you plan behind the hob?
- Joins, sockets and cut-outs
- Should the splashback match the worktop?
- Which finishes stay clean?
- How a DDL designer approaches a splashback
- What does a kitchen splashback cost?
- The bottom line
A splashback is looked at all day and cleaned all week. Those two jobs pull against each other, and most regret comes from choosing for the first and forgetting the second. A wall that looks wonderful in the showroom can be a chore behind a busy hob.
This page is the idea-led companion to our broader complete guide to kitchen tiles and splashbacks, which covers floors, worktops and cost bands. Here the question is narrower: which splashback (or backsplash, if that is the word you search) will still look right, and still wipe clean, in ten years.
Kitchen splashback ideas at a glance
- One porcelain slab behind the hob, with no vertical joint in the cooking zone.
- A full-height panel from worktop to ceiling, or to the underside of the wall units.
- A marble-effect porcelain with soft veining, so a stray splash does not stand out.
- An onyx-effect panel as a single feature wall, lit from the side or from the cabinet edge.
- A worktop upstand in the same material, topped with a quieter wall.
- Herringbone or stacked tiles on the section between two cabinets, not behind the cooker.
- A zellige-style handmade look on one small wall, where cleaning is occasional.
- Sockets grouped in one tidy run and set out before a tile is cut.
- A satin or honed finish rather than a high gloss, so smears do not show under task lights.
- A lit panel only where your electrician has planned it and the maker supports kitchen use.
Full-height slab or tile: which suits your kitchen?
Choose a slab or very large panel when the kitchen is calm, modern and has a long uninterrupted wall. Choose tile when the wall is broken up by windows, shelves and corners, or when you want the texture of a smaller format. The right answer depends on how many joints the wall can lose without looking forced.
A slab reads as one surface. It has almost no grout, so there is less to scrub, and it makes a plain run of cabinets feel built rather than assembled. The cost is planning. A large panel has to be measured, cut and carried into the room as a whole piece, and every cut-out is a risk to it.
Tile gives you freedom. A 600x1200mm tile laid upright climbs a good way up the wall in a single piece, so the wall needs few joints, and a smaller format copes better with a wall that is not quite square. For a deeper look at what these formats ask of the wall behind them, read our guide to large-format tiles and slabs.
| Option | Best for | Trade-off |
|---|---|---|
| Full-height porcelain slab | Long, plain walls; a seamless, built-in look | Needs exact measuring and careful handling; cut-outs are high stakes |
| Large-format panels (600x1200mm or 1200x1200mm) | Most kitchens; few joints with easier handling | Needs a flat wall; some joints remain |
| Marble or stone-effect porcelain | A natural look that wipes clean | Bold veining can overpower a small room |
| Onyx-effect panel | One feature wall or island back | Strong colour; use it once, not everywhere |
| Smaller patterned tiles | Between cabinets, alcoves, away from the hob | More grout lines to keep clean |
What does a porcelain slab splashback involve?
A porcelain slab splashback is a thin, large piece of porcelain fixed to a flat, prepared wall. The wall has to be flat and sound, the slab has to be ordered to measured sizes, and your installer needs experience with large panels. The reward is a surface with almost no joints.
Our large-format range runs from 600x600mm up to 1200x1200mm, with porcelain slabs going larger still. A 1200x1200mm tile behind a worktop can cover a short run with a handful of joints, and our large-format porcelain tiles page says large tiles show every flaw in the floor underneath: a small tile flexes over a dip, while a big one bridges it. The same logic applies to a wall, so a lump in the plaster can show in the finished surface.
Porcelain suits this job because of what it is. Under ISO 13006, dry-pressed porcelain with water absorption of 0.5% or less sits in group BIa. In plain terms, it barely soaks anything up, and it does not need sealing the way natural stone does. We cover the point in our post on whether porcelain tiles need sealing.
Marble, stone and onyx looks behind the cooker
A marble, stone or onyx-effect porcelain gives you the look of the natural material in a kitchen without the upkeep. The Natural Stone Institute says marble is vulnerable to mild acids, including those found in kitchens, and describes onyx as vulnerable to chemical attack. A kitchen has lemon, vinegar and wine in it. Porcelain copies the pattern in a material that does not need sealing the way natural stone does.
Marble-effect is the safest starting point. Soft grey veining is more forgiving of a stray splash than a stark white with one dramatic dark vein. If you want to see the range, start with our marble-effect tiles look book, and read the complete guide to marble-effect porcelain tiles for how to choose between finishes.
Onyx-effect is a bolder move. It has swirling, banded colour and it asks for restraint: one panel, one wall, one moment in the room. Porcelain is opaque, so unlike backlit natural onyx it will not glow from within. The effect comes from light skimming across the face, so think about wall lights or a cabinet-edge LED. Our onyx-effect look book shows the directions.
If your choice is a statement panel with a mirrored pattern, our post on book-matched tiles explains how consecutive pieces make the veining open up across the join. It works best on one clear surface, such as the wall behind a range cooker, not across every wall in the room.
Where does pattern belong in a splashback?
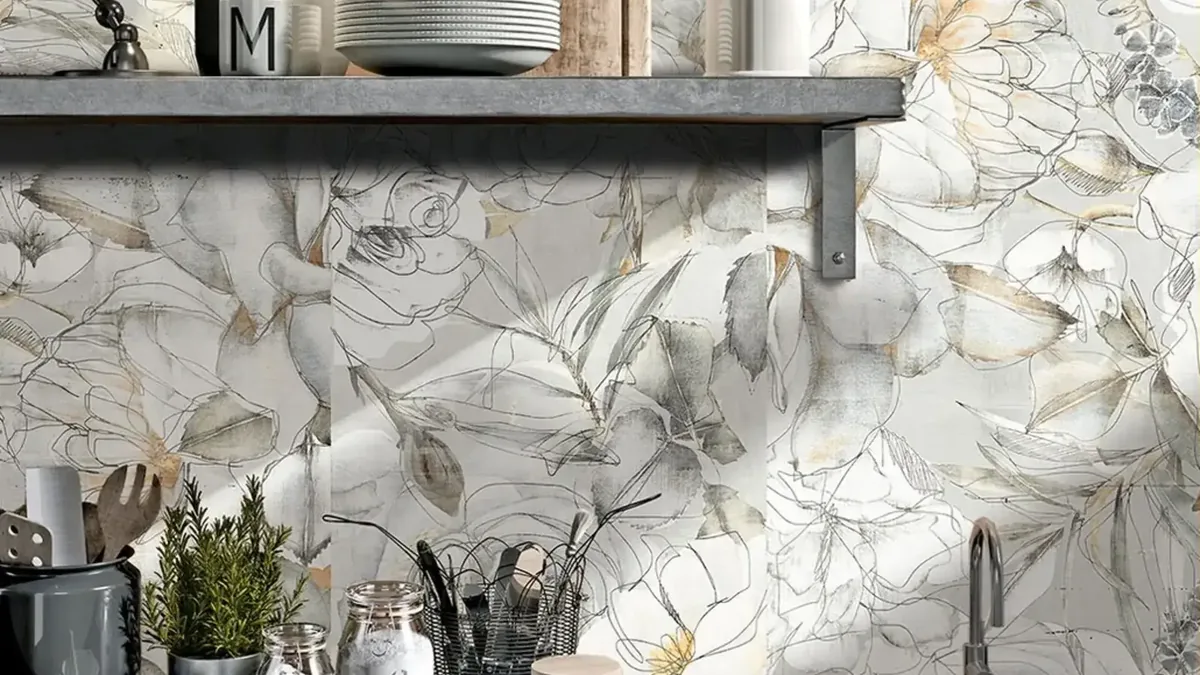
Put pattern where cleaning is occasional and the eye rests, such as between two tall units or at the end of a run. Keep it away from the cooker. Herringbone, stacked and zellige-style layouts add many grout lines, and grout is the part of a splashback that collects grease. Our post on tile layout patterns shows how each one lays out.
One practical idea: choose a grout colour close to the tile. A tonal grout tends to be more forgiving of everyday darkening than a bright white line, which shows marks sooner.
What should you plan behind the hob?
Plan the hob wall as the hardest-working part of the kitchen. It needs a surface that tolerates heat, wipes clean and has as few joints as possible. Check the clearances in the installation instructions for your hob and extractor, because those, not a design rule of thumb, set what can sit where.
We have deliberately not quoted a distance here. Safe gaps between a hob, the wall and anything above it depend on the appliance and the fuel, so they come from the manufacturer's instructions, and HSE states that anyone employed to work on gas appliances in domestic premises must be a Gas Safe registered engineer. Share the appliance model with whoever specifies your tiles so the cut-outs and the tile edges are set out around the real product.
Grease is the more common problem than heat. Oil vapour settles on everything, and a textured face or a grout line gives it more to cling to. That is why a smooth, large panel behind the hob is the single most useful upgrade in this list. Where the surface continues to the underside of the extractor, the wall stays easy to wipe from end to end.
Lit panels and glass
A lit splashback, whether a glass panel with LED behind it or an LED strip on the cabinet underside, should be planned with your electrician at first fix. Keep any lit panel away from the heaviest cooking zone and make sure the manufacturer supports its use in a kitchen. An LED strip under the wall units, throwing light across the face of the tile, is a simpler way to make a stone look come alive.
Joins, sockets and cut-outs
Sockets, switches and pipe holes should be positioned before a tile is ordered, and grouped so the cuts fall in line with the tile layout. A neat splashback is as much about where the holes go as where the tile goes. A random scatter of cuts spoils even a beautiful slab.
Anything that passes through a slab, such as a switch, a tap pipe or a hood duct, is a cut-out, and a cut-out is where a large piece is most likely to be damaged. Give the positions to your installer, and agree who orders a spare piece before the first cut.
- Group the sockets. A single horizontal run of sockets at one height looks planned, and it lets the tile joints fall above or below it.
- Centre cuts on a tile, not on a joint. A hole that crosses a grout line is a weak point and an eyesore.
- Agree the vertical joints. Decide where each one falls, away from the hob centre and not at the corner of a window.
- Treat the corners and the worktop edge as designed details. Ask your installer whether the worktop edge and internal corners should be finished in a flexible, colour-matched sealant rather than rigid grout, because those joints see movement.
- Keep a spare. Order extra material from the same batch so a replacement matches.
Electrical positions have to meet the wiring regulations, so ask your electrician to confirm socket heights and spacing, and then give those figures to the designer and the installer.
Should the splashback match the worktop?
Match it when you want a calm, continuous kitchen, and contrast it when the worktop is already strong. Running the worktop material up the wall removes the shelf where crumbs gather at the back edge. In a small room, a short upstand with a quieter wall above often looks better than a full-height run of heavy veining.
The fully matched version works well with porcelain, because a worktop slab and a wall panel can come from the same collection in different finishes. A polished wall pairs well with a honed or matt worktop in the same pattern. In an open-plan room, the kitchen then sits comfortably beside the floor, which we cover in our post on open-plan kitchen and living floors.
Which finishes stay clean?
Satin or honed finishes are generally the more forgiving choice, because they show fewer fingerprints and smears than polished surfaces and are easier to wipe than heavily textured ones. That is design reasoning, not a test result, so judge a sample under your own kitchen lights.
Under cabinet lights, a polished face shows each fingerprint and each splash. A fine matt or honed face is more forgiving, though in a dim kitchen it can look flat and needs more light. Our post on matt versus polished tiles sets out the trade-off in detail.
How a DDL designer approaches a splashback
A designer starts with the cooker wall, not the mood board. The questions come in a fixed order: where is the hob, how far does the surface need to run, where do the sockets and extractor sit, and only then which material and which pattern. We describe the reasoning below as design practice, not as an account of a particular client.
- Fix the hob zone first, and choose the surface with the fewest joints for it.
- Mark every socket, switch and pipe on the wall elevation.
- Set out the tile or slab so joints fall away from the cooker and the cuts sit in line.
- Choose the veining or pattern for the rest of the wall, allowing for the worktop beside it.
- Write all of it into a specification your installer can build from.
That last step matters. DDL designs and specifies, and your own installer fits the work from our written specification. Large materials are much easier to judge in person than on a screen, which is why we suggest seeing a sample against your worktop.
What does a kitchen splashback cost?
We do not quote a figure here, because the price varies from kitchen to kitchen. For wider kitchen tiling, see the complete kitchen tiles and splashbacks guide. The biggest drivers are the material and format, how much of the wall it covers, how many cut-outs it needs, the layout pattern and the installer's time on large pieces.
- A slab or large panel costs more to handle, and less in grout and cleaning time.
- Pattern and specialist cuts add installer hours.
- Many cut-outs increase risk, and a spare piece may be worth ordering.
- Full height uses more material than a short upstand.
The bottom line
Design a splashback from the hob outwards. Behind the cooker use a porcelain slab or a large panel with as few joints as you can manage, in a satin or honed finish that forgives fingerprints. Elsewhere you can add a marble, stone or onyx look, or a little pattern, where cleaning is occasional. Settle sockets and cut-outs before ordering, check hob and extractor clearances with the manufacturer, and match or contrast the worktop on purpose. Porcelain in group BIa under ISO 13006 absorbs 0.5% water or less, so it does not need sealing the way natural stone does.
Ready to see it at full size? Book a complimentary showroom appointment at our Watford studio and bring a photo of the kitchen, your worktop sample and the square metres of wall you want tiled. A standard showroom appointment does not include reviewing plans or estimating quantities from drawings, so have your measurements ready.
Sources
- ISO 13006:2018 sample, ceramic tiles: classification and designation, for group BIa as dry-pressed tiles with water absorption of 0.5% or less.
- Natural Stone Institute: Marble, Onyx and Serpentine and its stone care guidance, on marble and acids and onyx and chemical attack.
- HSE: gas safety for home owners and occupiers, on gas appliance work needing a Gas Safe registered engineer.
- DDL Tiles, large format porcelain tiles, for the 600x600mm to 1200x1200mm range and the note on flaws in the surface underneath.